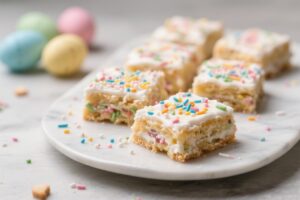
Looking for a fun spring bake that feels festive without a lot of fuss? These Easter Egg Blondies are soft, chewy, and loaded with crunchy chocolate eggs in every bite. They come together with simple pantry staples and bake in under half an hour.
The edges get golden and crisp while the center stays buttery and tender. Serve them at a family brunch, tuck them into baskets, or bring a pan to a potluck—there won’t be a crumb left.
What Makes This Special
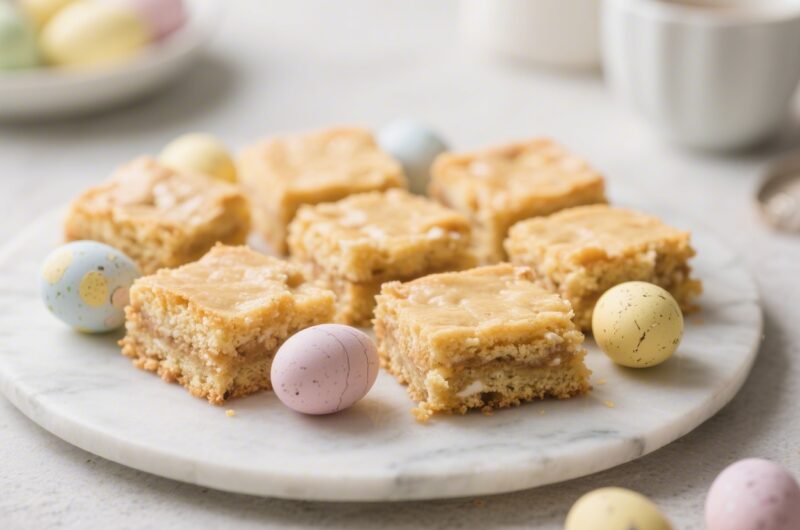
These blondies deliver that classic butterscotch flavor thanks to brown sugar and melted butter, with a fun twist from crushed candy-coated chocolate eggs. They slice cleanly, travel well, and taste even better the next day.
The texture is the perfect balance of chewy middle and slightly crisp edges. Best of all, the recipe is flexible—swap in different chocolates, adjust the sweetness, or add nuts for extra crunch. It’s the kind of treat that looks festive but doesn’t require special skills.
Recipe Card
Easter Egg Blondies
What You Need
All-purpose flour – the base of the batter
Baking powder – a little lift
Fine sea salt – balances sweetness
Unsalted butter – melted, for rich flavor and chew
Light brown sugar – packed, for butterscotch notes
Granulated sugar – for structure and crackly top
Large eggs – room temperature
Vanilla extract – warm, round flavor
Candy-coated chocolate Easter eggs – whole and roughly chopped
Chocolate chips (optional) – semisweet or milk
Chopped nuts (optional) – pecans or walnuts
Flaky sea salt (optional) – for finishing
Nonstick spray or parchment paper – for lining the pan
Instructions
- Prep the pan and oven. Heat the oven to 350°F (175°C). Line a 9×13-inch baking pan with parchment, leaving overhang for easy lifting. Lightly grease the parchment.
- Melt the butter. In a saucepan or microwave-safe bowl, melt 1 cup (2 sticks) unsalted butter. Let it cool for 3–4 minutes so it’s warm, not hot. Warm butter helps dissolve sugar; hot butter can scramble eggs.
- Whisk the sugars. In a large bowl, whisk together 1 1/4 cups light brown sugar and 1/2 cup granulated sugar. Pour in the melted butter and whisk until glossy and slightly thick, about 30–45 seconds.
- Add eggs and vanilla. Whisk in 2 large eggs, one at a time, then 2 teaspoons vanilla extract. Mix until the batter looks smooth and cohesive.
- Combine dry ingredients. In a separate bowl, whisk 2 cups all-purpose flour, 1 teaspoon baking powder, and 3/4 teaspoon fine sea salt.
- Bring it together. Fold the dry ingredients into the wet using a spatula. Stop when a few streaks of flour remain. Do not overmix—that keeps the blondies tender.
- Stir in the fun stuff. Fold in 1 1/2 cups roughly chopped candy-coated chocolate eggs and 1/2–3/4 cup chocolate chips if using. Reserve a small handful of chopped eggs for the top.
- Spread and top. Scrape the batter into the pan and smooth it into an even layer. Sprinkle the reserved chopped eggs over the surface. If you like a sweet-salty hit, add a light pinch of flaky sea salt.
- Bake. Bake for 22–28 minutes, until the edges are set and deeply golden and the center no longer looks wet. A toothpick should come out with a few moist crumbs, not wet batter.
- Cool and slice. Cool in the pan on a rack for at least 30–45 minutes. Use the parchment to lift the slab out, then cut into squares or bars. Tip: A plastic knife or warm, clean knife makes tidier cuts through the candy shells.
Storage Instructions
Keep blondies in an airtight container at room temperature for up to 4 days. They stay soft and chewy and actually taste richer on day two.
For longer storage, wrap bars tightly and freeze for up to 2 months. Thaw at room temperature for 30–45 minutes or warm briefly in the microwave for a gooey center.
If your kitchen runs warm, consider refrigerating to preserve the snap of the candy shells. Let them come back to room temp before serving for the best texture.
Health Benefits
These are a treat, but you can still make thoughtful choices. Portion control helps keep sugar and calories in check—cut smaller squares for a light bite.
Using dark chocolate chips can add a touch of antioxidants and a more complex flavor. A handful of nuts brings healthy fats, protein, and fiber for a more satisfying square.
You can also reduce total sugar slightly without harming texture. Swap a portion of the all-purpose flour for white whole wheat flour to increase fiber while keeping the blondies tender.
The goal isn’t to turn them into health food—just to make a feel-good treat that still tastes amazing.
What Not to Do
- Don’t overbake. Dry blondies lose their chew. Pull them when the center is just set with moist crumbs on the tester.
- Don’t skip cooling time. Slicing too soon can cause crumbling and smeared candy shells.
- Don’t overmix the batter. Toughness comes from overworking the flour.
- Don’t use hot butter with eggs. You’ll end up with a greasy, curdled mixture.
- Don’t add all the candy inside. Save some for the top so every bar looks festive and colorful.
Recipe Variations
- Brown Butter Blondies: Brown the butter until nutty and golden, cool slightly, then proceed. This adds deep toffee flavor.
- Peanut Butter Swirl: Dollop 1/3 cup warmed peanut butter over the batter in the pan.
Swirl with a knife before baking.
- Coconut Crunch: Fold in 1/2 cup sweetened shredded coconut and 1/2 cup chopped macadamias for tropical flair.
- Gluten-Free: Use a 1:1 gluten-free all-purpose flour blend with xanthan gum. Check that your candies are gluten-free.
- Salted Caramel: Swirl 1/4–1/3 cup thick caramel sauce into the batter and finish with flaky sea salt.
- Extra-Chocolate: Replace 1/4 cup flour with cocoa powder and use milk chocolate chips for a brownie-blondie hybrid.
- Mini Skillet Blondies: Bake in two 8-inch cast-iron skillets for 18–22 minutes and serve warm with ice cream.
FAQ
Can I use only brown sugar?
Yes. Using all brown sugar increases moisture and butterscotch flavor, yielding an extra-chewy texture.
If you skip granulated sugar entirely, the top may be less crackly, but the bars will still be excellent.
Do I need to chill the dough?
No chilling is required. This is a quick batter that bakes right away. If your kitchen is very warm and the batter feels runny, let it rest 5–10 minutes to thicken slightly before baking.
How do I crush the Easter eggs without a mess?
Place them in a zip-top bag and tap gently with a rolling pin.
Aim for a mix of chunks and smaller bits. Avoid pulverizing them into dust—the crunch is part of the charm.
My blondies sunk in the middle. What happened?
They may have been underbaked or the pan was removed too soon.
Also check your baking powder’s freshness. Using a pan that’s too small can cause undercooked centers; stick to a 9×13 for even baking.
Can I make these in an 8×8 pan?
You can halve the recipe for an 8×8 pan and bake for 22–28 minutes. If you bake the full recipe in an 8×8, the center likely won’t set properly before the edges overbrown.
How do I get clean slices?
Cool completely, then use a sharp knife or a plastic knife for cutting through the candy shells.
Wipe the blade between cuts. You can also chill the slab for 30 minutes to firm it up before slicing.
What’s the best way to reheat?
Microwave a square for 10–15 seconds to soften the center without melting the candies. For a crisper edge, warm in a 300°F oven for 5–7 minutes.
Can I use different candies?
Absolutely.
Chopped chocolate bars, mini peanut butter cups, malted milk eggs, or pastel M&M-style candies all work. Aim for 1 1/2 to 2 cups total mix-ins.
Final Thoughts
Easter Egg Blondies are the kind of dessert that look playful but taste wonderfully classic. They’re simple, reliable, and easy to tailor to your crowd.
Keep the base recipe handy, then tweak the mix-ins and flavors through the season. Whether you serve them slightly warm with ice cream or pack them for a sunny picnic, they’re a feel-good treat that brings people around the table. Happy baking—and enjoy every chewy, colorful bite.