Let’s be honest… sometimes you want a cute little home upgrade without committing to a full room makeover or turning your living space into a DIY disaster zone.
That’s exactly where tiny clay planters come in.
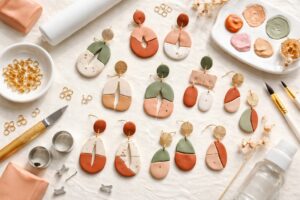
They’re small, stylish, and ridiculously satisfying to make. You get that “I made this” moment without spending hours figuring things out or needing a whole craft cupboard you’ll never touch again. And somehow, even the slightly imperfect ones still look intentional. That’s the magic.
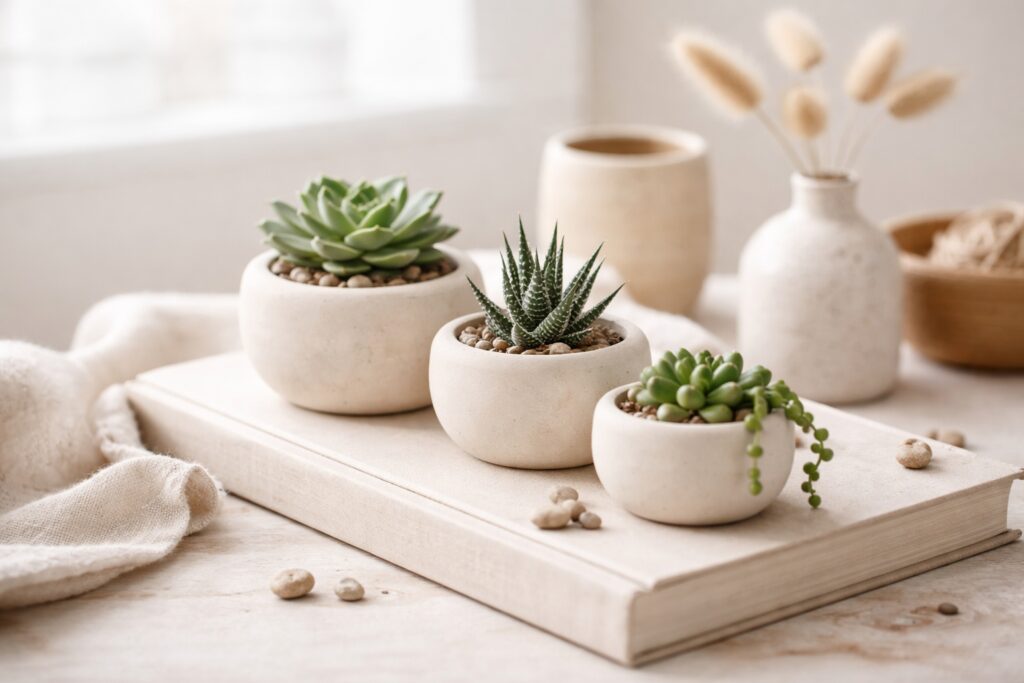
These little planters are perfect for desks, windowsills, or that random corner that needs a bit of life. The soft, matte clay finish gives that modern, earthy vibe that just works with everything. Think mugs, books, glass jars… your whole aesthetic just levels up without trying too hard.
The best part? You don’t need to be crafty. This is one of those forgiving, beginner-friendly projects where the less perfect it is, the better it looks. Slightly uneven edges, soft curves, organic shapes… all part of the charm.
So if you’ve been craving a simple creative moment that actually turns into something cute and useful, this is it.
Why Tiny Clay Planters Are Worth Making
Tiny clay planters are one of those rare DIYs that hit the sweet spot between easy and actually worth it. No overwhelm, no complicated steps, just something you can make in an afternoon that instantly upgrades your space.
First, they’re completely customisable. You’re not stuck with whatever the shops are selling. You can make them taller, wider, chunkier, smoother… whatever fits your space and your plant. Even the tiniest succulent suddenly feels styled when it has a planter that actually suits it.
Then there’s the look. That soft, matte, glaze-free finish? It’s effortlessly chic. It gives that modern, earthy vibe that works with literally everything. Whether your space leans minimal, cosy, or a little bit boho, these just blend right in without trying too hard.
They’re also budget-friendly, which we love. A small amount of clay goes a long way, so you can make a few in one go without spending much at all. And because they look so polished, they double as thoughtful little gifts. Add a tiny plant and suddenly you’re the friend who gives aesthetic presents.
And honestly, they’re just fun. This is the kind of project you can do with a coffee, a podcast, and zero pressure to be perfect. A little creative moment that leaves you with something cute, useful, and very Pinterest-worthy.
What You’ll Need
Nothing overwhelming here, promise. This is a keep-it-simple, use-what-you-have kind of project with a few easy extras if you want to level things up.
- Air dry clay is your best beginner-friendly option. No kiln, no stress, just shape it and let it dry.
- Polymer clay is great if you want a slightly more durable finish. This one needs baking, so only go for it if you’re happy using your oven.
- A clay tools set is helpful, but not essential. You can absolutely get away with using a spoon, butter knife, or even your fingers.
- Fine grit sandpaper is perfect for smoothing out any rough edges once your planter is dry.
- A clay sealant is optional, but great if you want a longer-lasting finish or plan to water your plants directly.
- Small succulents are the cutest finishing touch. Go for something low-maintenance so you can keep things easy.
- Plant pebbles for drainage might be a tiny detail, but they make a big difference. They help prevent soggy roots and keep your planter looking fresh.
Optional extras if you’re feeling a little fancy:
- Texture tools can add subtle detail without overcomplicating things
- An acrylic paint set lets you customise your planter if you want a hint of colour
Start simple. You can always add more details later once you realise how addictive this is going to be.
Choosing Your Style (Before You Start)
Before you even touch the clay, take a second to decide the vibe you’re going for. This is what takes your planter from “cute little DIY” to “wait… did you buy that?”
The key here is intention. Even if the shape ends up a little imperfect, having a clear style in mind makes everything look more elevated.
Start with the shape.
Do you want something soft and rounded that feels organic and relaxed? Or something a little more structured and geometric? Rounded shapes are more forgiving (and very beginner-friendly), while cleaner lines give a slightly more modern, minimal look.
Next, think about the finish.
Smooth planters feel polished and simple, while textured ones add a bit more personality. You can keep it completely minimal or press in subtle patterns using fabric, lace, or even your fingertips.
Now let’s talk colour.
Neutral tones are your best friend here. Think soft beige, warm white, or natural clay. That matte, earthy finish is what gives these planters that effortless, goes-with-everything aesthetic. If you do want to add colour, keep it soft and understated so it still feels elevated.
And finally, embrace the imperfections.
This is not the time for perfectionism. Slightly uneven edges, soft curves, and organic shapes are exactly what make these look expensive and intentional. If it looks a little “too perfect,” you’ve probably overworked it.
Decide your vibe, keep it simple, and let the clay do its thing.
Step-by-Step: How To Make Your Tiny Planter
This is where the magic happens. No pressure, no perfection required. Just you, some clay, and a very cute end result waiting to happen.
Step 1: Shape Your Base
Start by rolling your clay into a smooth ball.
Press your thumb gently into the centre to create a hollow, then slowly widen it.
Think of this as the foundation. Keep it thick enough to hold its shape but not so chunky that it feels heavy.
Step 2: Build the Walls
Using your fingers, gently pinch and rotate the clay to bring the walls up.
Take your time here.
Turn the piece as you go so the thickness stays even all the way around. This helps prevent cracks later and keeps everything looking balanced.
Step 3: Refine the Shape
Once you’ve got your basic form, smooth things out.
Use your fingers or a slightly damp cloth to soften any harsh lines.
Gently curve the rim instead of leaving it sharp. This is what gives that soft, organic, high-end look.
Step 4: Add Personality
Now you decide how minimal or detailed you want to go.
Leave it smooth for a clean, modern feel
Or press in subtle textures for a bit of interest
Just don’t overdo it. A little detail goes a long way here.
Step 5: Let It Dry
Set your planter aside and let it fully dry according to your clay instructions.
This is the part where you do nothing… which is honestly the hardest step.
Avoid touching or moving it too much while it dries so it keeps its shape.
And that’s it. You’ve officially made something cute, useful, and very Pinterest-worthy.
Finishing Touches
This is where your tiny planter goes from “cute DIY” to “wait… that looks expensive.”
Once your planter is fully dry, it’s time to refine and elevate the final look. Don’t skip this part. It’s the difference between handmade and intentionally handmade.
Start with a light sanding.
If there are any rough edges or uneven spots, gently smooth them out using fine grit sandpaper. You’re not trying to reshape it, just soften anything that feels a bit too raw.
Next, decide if you want to seal it.
If you’re planning to water your plant directly inside the planter, adding a sealant is a smart move. It helps protect the clay and keeps everything looking fresh for longer. If you love that natural, matte look, go for a subtle, non-glossy finish.
Now step back and check the overall vibe.
Is the rim soft and slightly curved?
Does the shape feel balanced but still organic?
If yes, you nailed it.
The goal here isn’t perfection. It’s that effortless, slightly imperfect finish that looks like it belongs in a styled Pinterest photo without even trying.
Planting Your Succulent (The Cute Part)
Now for the part where it all comes together and suddenly your little creation looks like something straight off Pinterest.
Start with a layer of pebbles at the bottom.
This helps with drainage and stops your plant from sitting in excess water. It’s a tiny step, but it makes a big difference and, honestly, it looks adorable too.
Next, add a small amount of soil.
You don’t need much. Just enough to support your plant and give the roots a place to settle.
Gently place your succulent into the planter.
Hold it steady while you add a little more soil around it, pressing lightly to keep everything in place. Don’t pack it too tightly. Succulents like a bit of breathing room.
Once it’s in, give everything a quick tidy.
Brush away any loose soil from the edges and clean up the rim so it looks neat and intentional.
And that’s it.
You’ve gone from a lump of clay to a fully styled, ridiculously cute planter that actually serves a purpose. Honestly, this is the moment where you’ll want to make five more.
Styling Your Tiny Planters
This is where you really get to have fun. Because yes, you made the planter… but how you style it is what makes it look effortlessly put together instead of just placed there.
Start by thinking in little moments, not just single items.
One planter on its own is cute. A small styled corner? That’s a whole vibe.
Place your planter next to things you already love.
Stack it with a couple of books, sit it beside your favourite mug, or pair it with a glass jar or candle. These everyday items instantly make it feel intentional without trying too hard.
Group in odd numbers.
Two is fine, but three just looks better. Try mixing a couple of planters in different shapes or sizes while keeping the colour palette consistent so it still feels cohesive.
Use small spaces to your advantage.
Desks, windowsills, bedside tables… these are perfect spots. Tiny planters shine in places that need a little life but don’t have loads of room.
Keep the palette calm.
Soft neutrals, warm tones, and natural textures will always give you that elevated, Pinterest-ready look. Even if everything else is a bit chaotic, this keeps it feeling pulled together.
And finally, don’t overthink it.
If it makes you pause for a second and think “okay, that looks cute,” you’ve already nailed it.
Beginner Tips That Make a Big Difference
Before you run off and make ten of these (you will), here are a few little tips that take your planters from “first try” to wait… how is that so good?
Don’t overwork the clay.
The more you mess with it, the harder it becomes to keep that soft, organic shape. Shape it, refine it, then leave it alone. Trust the process.
Keep it small and simple.
Tiny planters are way easier to get right than larger ones. Start small, build confidence, then experiment once you’ve got the feel for it.
Embrace imperfections.
Slightly uneven edges, soft curves, and subtle texture are what make these look high-end. If it’s a little wonky, it’s probably perfect.
Watch your thickness.
Too thin and it might crack. Too thick and it can look heavy. Aim for even walls all the way around so it dries properly and keeps its shape.
Let it dry properly.
I know, patience is not the vibe. But rushing this step can ruin all your hard work. Leave it somewhere safe and let it do its thing.
Start with one.
You’ll be tempted to batch-make straight away, but doing one first helps you figure out your style and technique without overwhelm.
These tiny tweaks are what make the whole thing feel easy instead of frustrating. And once you’ve got the hang of it, you’ll be making them on autopilot.
Gift Idea: The Cutest Handmade Present
If you’re ever stuck on what to give someone, this is your answer. Tiny clay planters are one of those gifts that feel thoughtful, personal, and actually useful… without you spending a fortune or stressing about it.
They’re easy to customise.
You can tweak the shape, size, or texture to suit the person you’re making it for. Keep it minimal for someone who loves a clean aesthetic, or add a little texture for a bit more personality.
Add a plant and suddenly it’s a whole moment.
Pop in a small succulent and it instantly looks like a complete, styled gift instead of just a DIY project.
Presentation makes all the difference.
Wrap it in a soft linen cloth, place it in a small box, or tie it with a bit of twine for that effortless, Pinterest-worthy finish. You don’t need anything over the top. Simple always wins here.
It feels personal without being complicated.
That’s the beauty of it. You’ve made something by hand, but it still looks polished and intentional, not overly crafty.
Honestly, this is the kind of gift that makes people say, “Wait, you made this?”
And yes… you absolutely did.
FAQs
Got questions? I’ve got you. Here are the things you’re probably wondering before you fully commit to your tiny planter era.
Do I need to add drainage holes?
Not necessarily. Because these are small, adding pebbles at the bottom usually does the job. Just be careful not to overwater. If you prefer, you can poke a small hole before drying, but it’s optional.
What type of clay is best for beginners?
Air dry clay is the easiest place to start. No baking, no special tools, and very forgiving. If you want something more durable, polymer clay is a great next step.
How long do they take to dry?
It depends on the clay you’re using, but most air dry clay takes around 24 to 48 hours. The key is letting it dry fully before sanding or sealing.
Can I paint my planter?
Yes, but keep it subtle if you want that chic, modern look. Soft neutrals or a light wash of colour work best. You can always leave it natural for that earthy finish.
What plants work best in tiny planters?
Succulents are perfect. They’re low maintenance, don’t need much water, and fit beautifully into small spaces.
Will they last over time?
Yes, especially if you handle them with a bit of care. Adding a sealant can help protect them, particularly if they’ll be exposed to water.
Simple, easy, no overthinking required.
Conclusion
See? That was way easier than you expected.
Tiny clay planters are one of those projects that look impressive but don’t require hours of effort or a full creative meltdown to pull off. You get something stylish, useful, and completely your own… without overthinking every step.
And the best part? Once you’ve made one, you’ll want to try different shapes, sizes, and little variations. It’s one of those low-effort, high-reward DIYs that quickly turns into a bit of an obsession.
So if you’ve been waiting for a sign to try something creative without the pressure of getting it perfect, this is it.
Make one, style it, admire it… and then immediately start planning your next one.
Check out other Oven Bake Clay Craft Ideas to Try This Weekend!